
You can add participants to KidKare manually. When you add participants via this method, you must input participant details one-by one. Watch the video below, or scroll down for step-by-step instructions.
Required Permissions: You must have the Child Enrollment permission enabled on your account to add participants.
- From the menu to the left, click Participants.
Note: According to your display settings, this option and page may be called something different, such as Kids. For more information, see Set Display Settings.
- Click
 , and select Add Manually. The button will default to Add Manually the next time you access the Participants page.
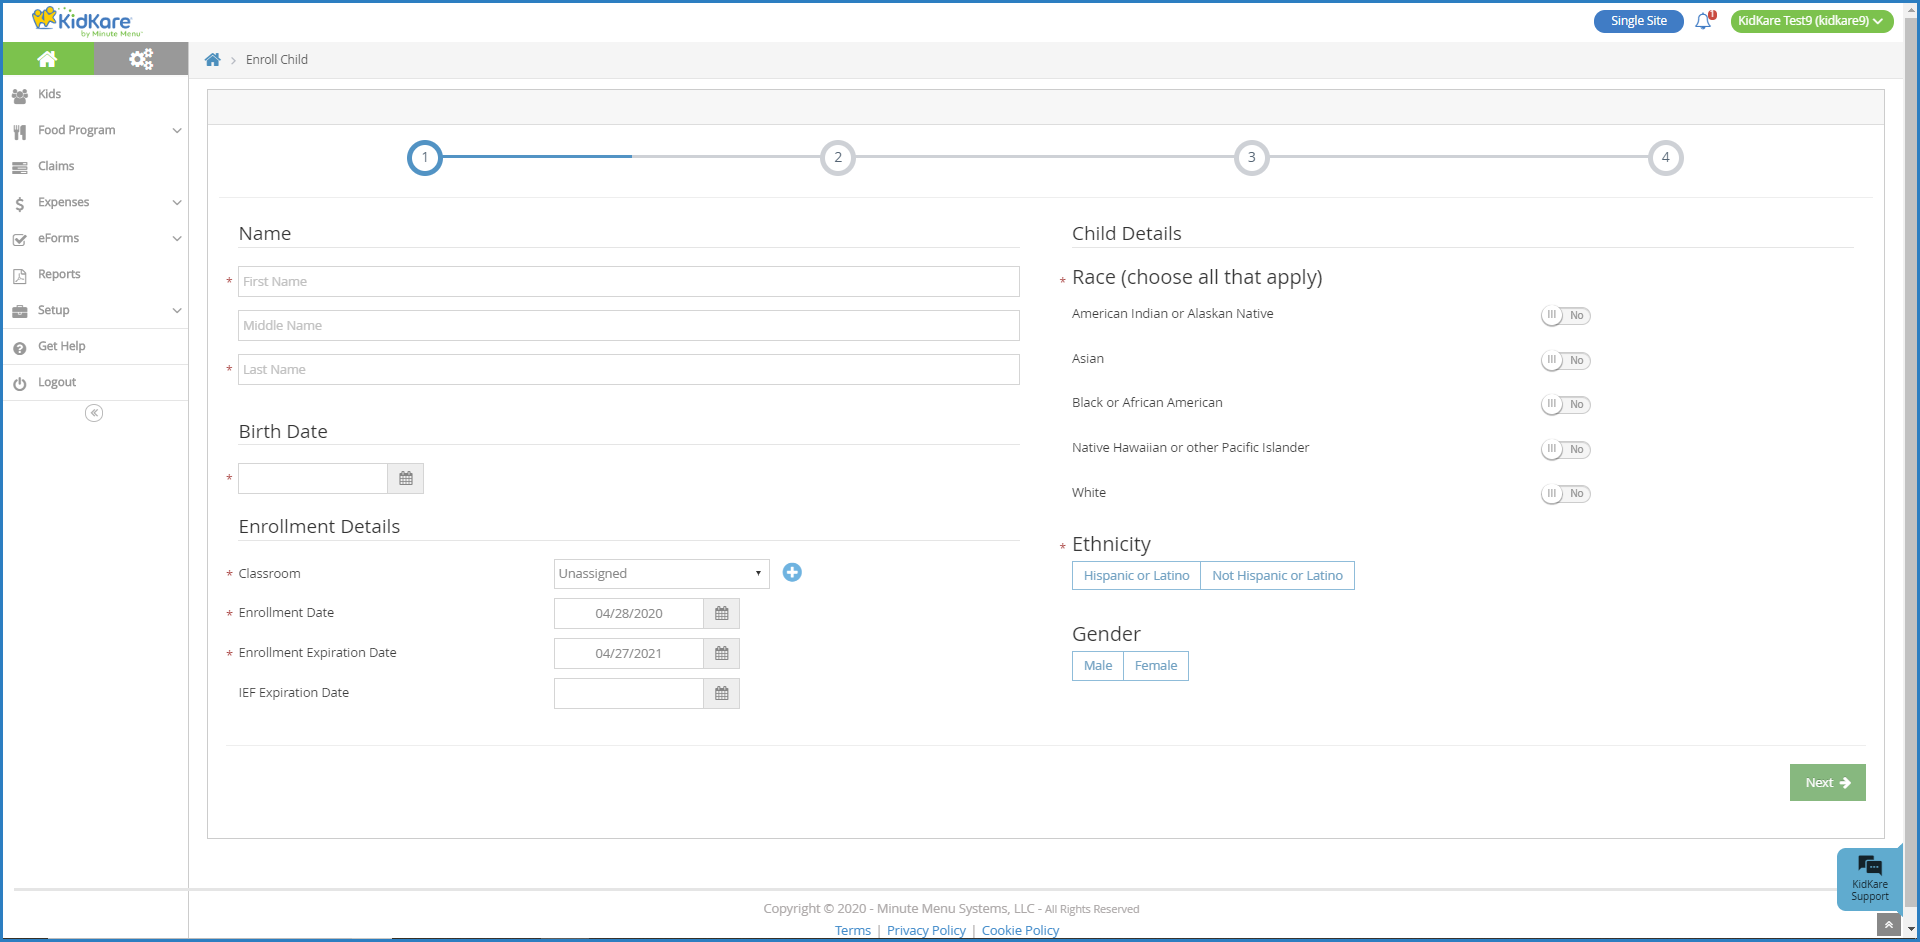
- In the Name section, enter the participant's first, middle, and last name. You must enter at least a first and last name.
- In the Birth Date section, enter the participant's birth date. You can also click
 to select the date from a calendar.
 - In the Enrollment Details section:
- Click the Classroom drop-down menu and select the classroom to which to assign the participant you are enrolling. Select Unassigned to assign the participant to a classroom later. You can also click
 to add a new classroom.
 - Click the Enrollment Date box and accept the default enrollment date (today's date), or change it. The Enrollment Expiration Date box populates automatically. It is set to one (1) year from the enrollment date you entered.
- Click the IEF Expiration Date box and enter the date on which the participant's income eligibility expires. This field is optional.
- Click the Classroom drop-down menu and select the classroom to which to assign the participant you are enrolling. Select Unassigned to assign the participant to a classroom later. You can also click
- In the Participant Details section, select the participant's race, ethnicity, and gender. You must at least select a race and ethnicity.
- Click Next.
- If you are enrolling a non-infant, the Primary Guardian page opens. Go to Step 10.
- If you are enrolling an infant, the Infant Details page opens. Continue to Step 8.
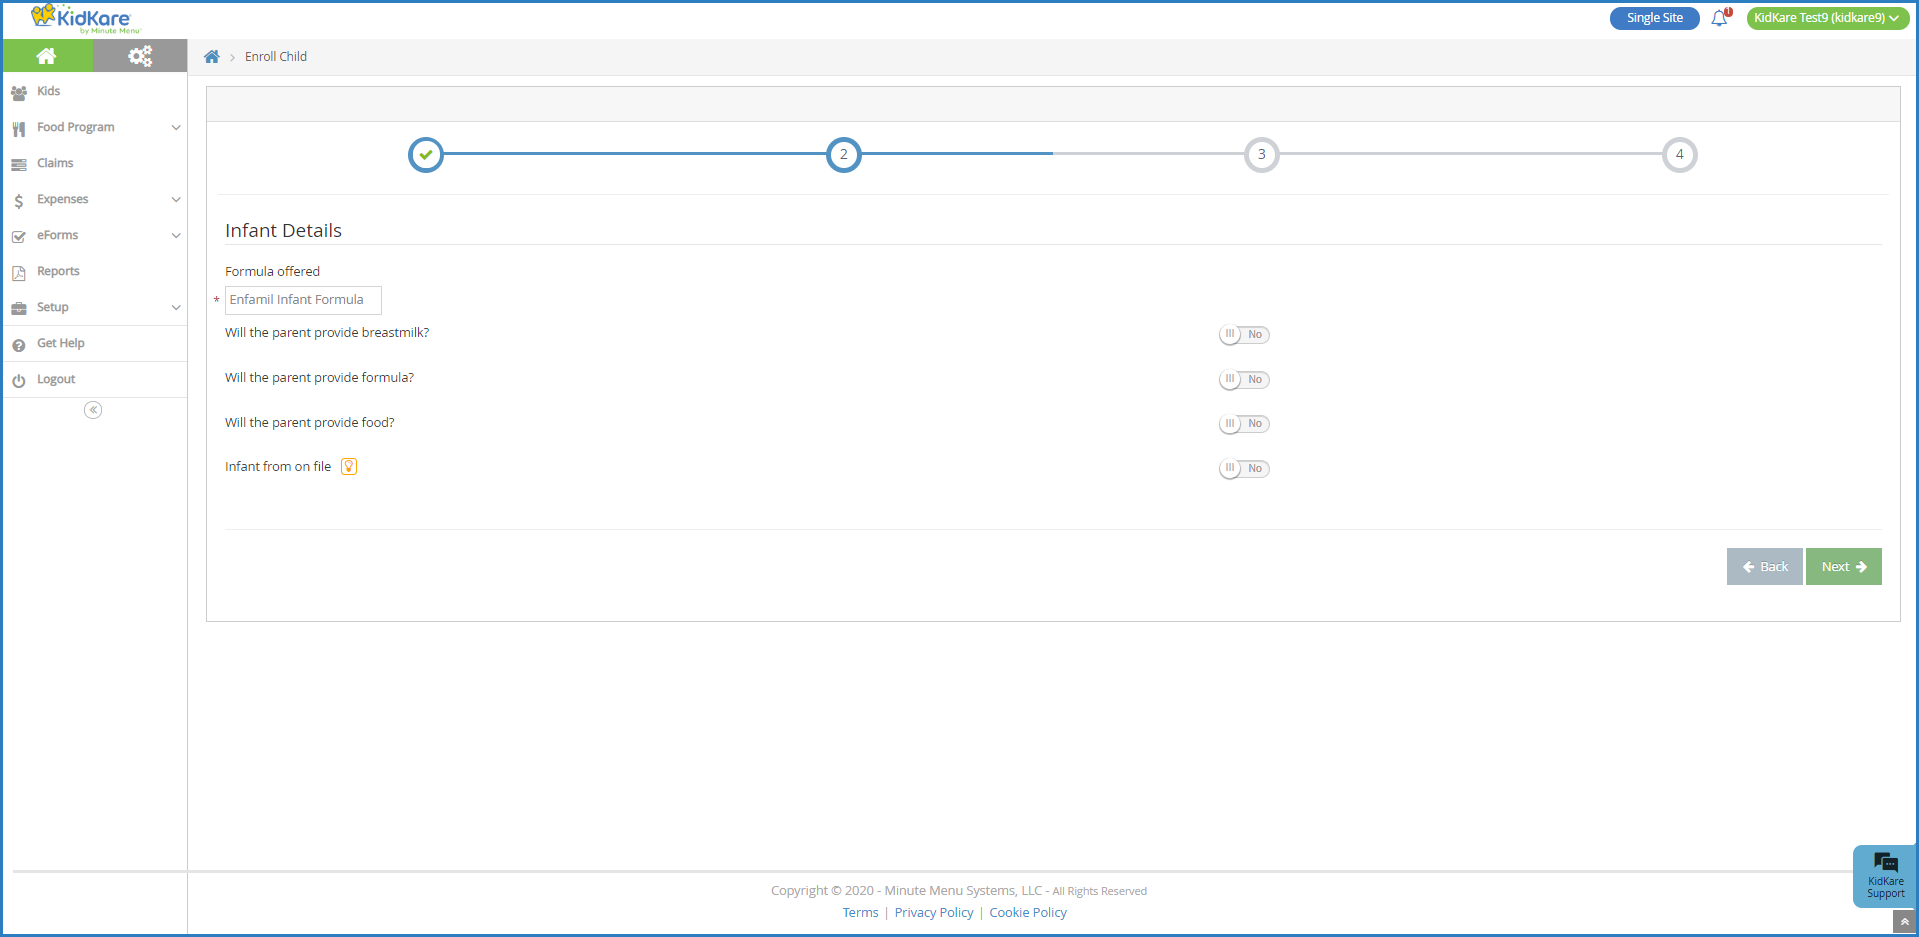
- On the Infant Details page:
- Click the Formula Offered box and enter the name of the formula you offer to infants. The formula name you enter here will populate this box automatically for future infant enrollments. This box is required, unless the parent is providing formula/breast milk.
- If the parent is providing breast milk, click
 next to Will the Parent Provide Breastmilk.
 - If the parent is providing formula, click
 next to Will the Parent Provider Formula. If you set this to Yes, you do not have to enter anything in the Formula Offered box. Enter the formula name in the corresponding Name box.
 - If the parent is providing food, click
 next to Will the Parent Provide Food.
 - Click
 next to Infant Form on File to indicate that you have a form on file for this infant. This option may not display for all centers and is dependent on your policy settings.
- Click Next. The Primary Guardian page opens.
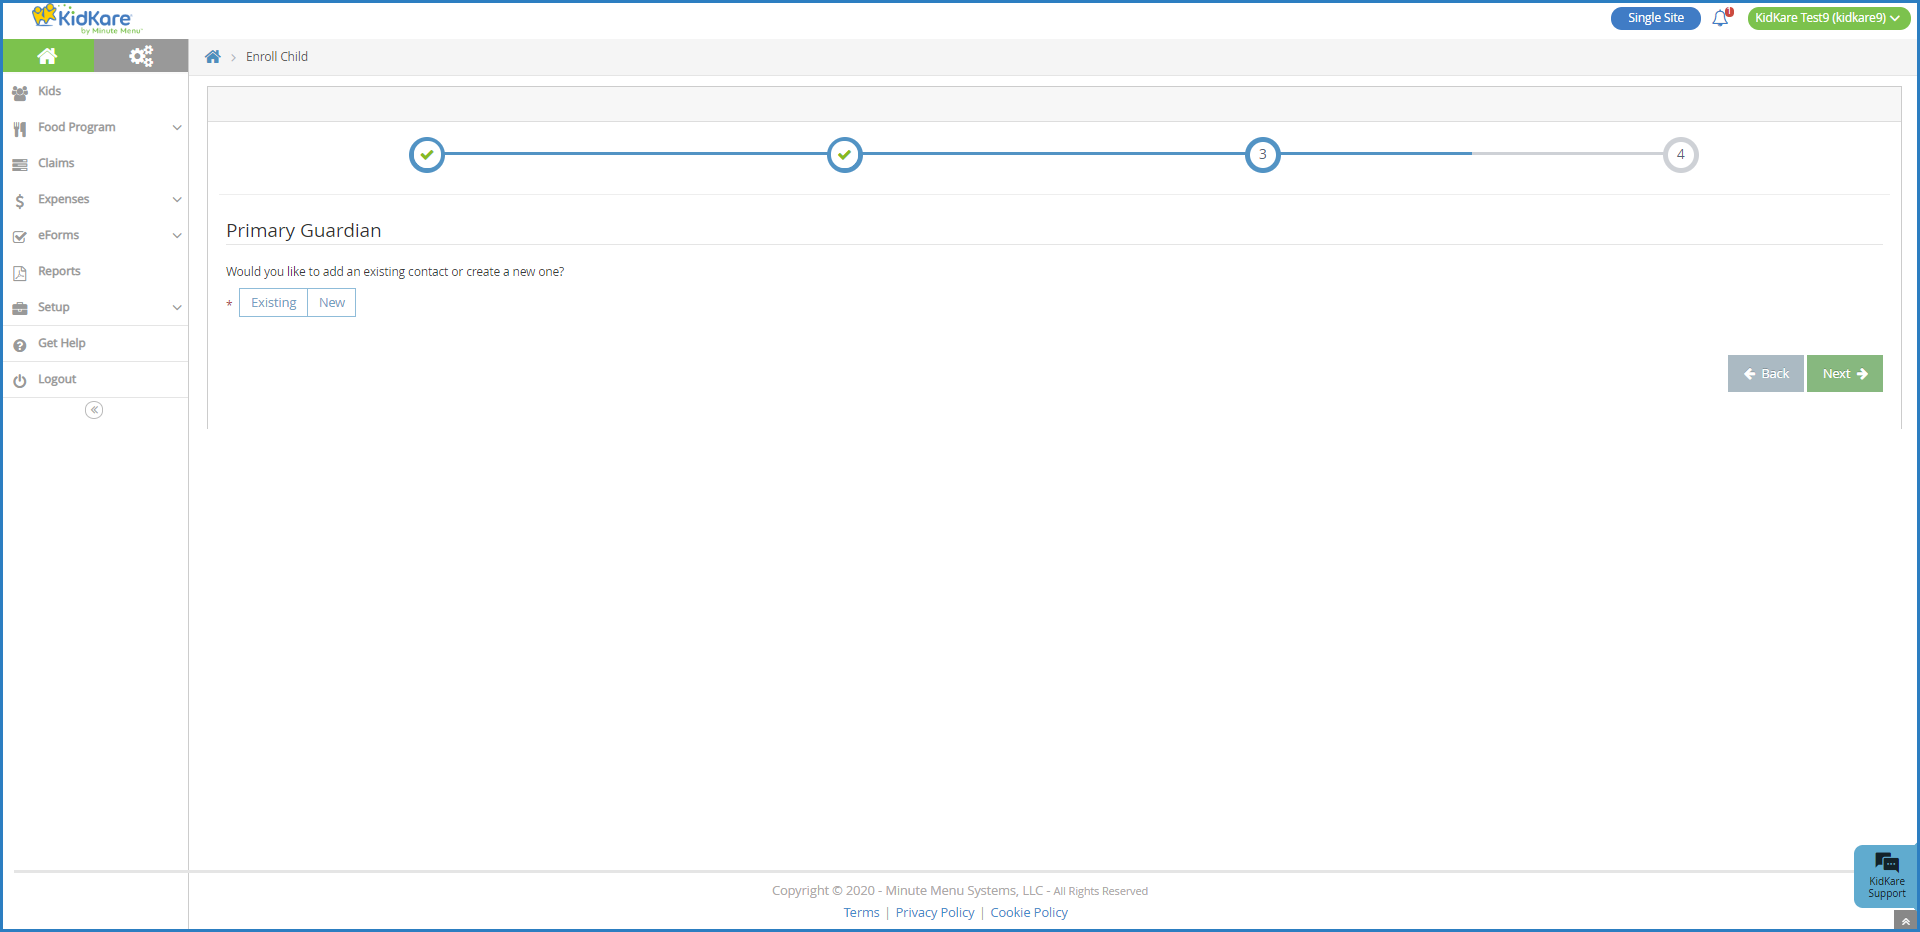
- Add a primary guardian.
- Click Existing to select an existing parent/guardian. Then, select the contact.
- Click New to add a new parent/guardian and enter their information.
- Click Next. The final enrollment page opens.
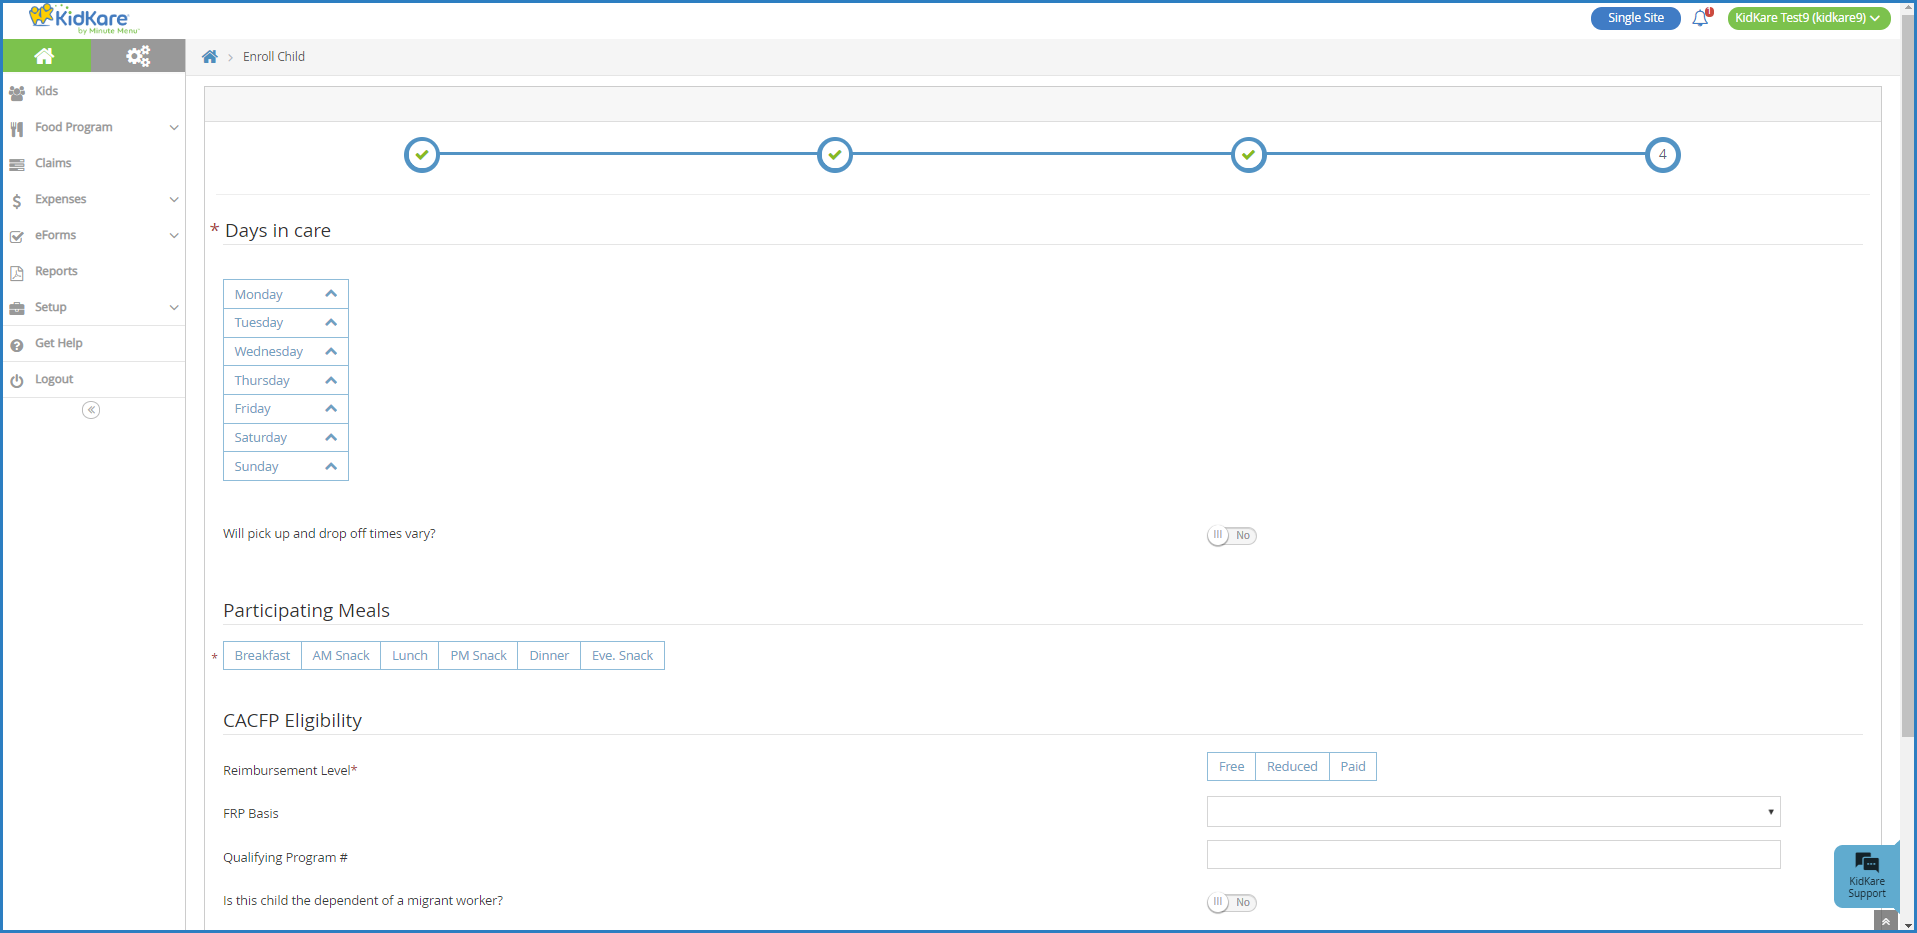
- In the Days in Care section, select the days and times the participant is typically in care.
- Select the days and in and out times. When entering times, you can click the
 to select the time with arrows.
 - Click the slider next to Will Pick Up and Drop Off Times Vary if the participant's in/out times vary each day.
- Click the slider next to Will Child Stay Overnight if the participant will stay at your center overnight at any time.
- Select the days and in and out times. When entering times, you can click the
- In the Participating Meals section, click each meal in which the participant participates.
- In the CACFP Eligibility section:
- Select this participant's reimbursement level: Free, Reduced, or Paid.
- Click the FRP Basis drop-down menu and select the determining factor of the participant's reimbursement level.
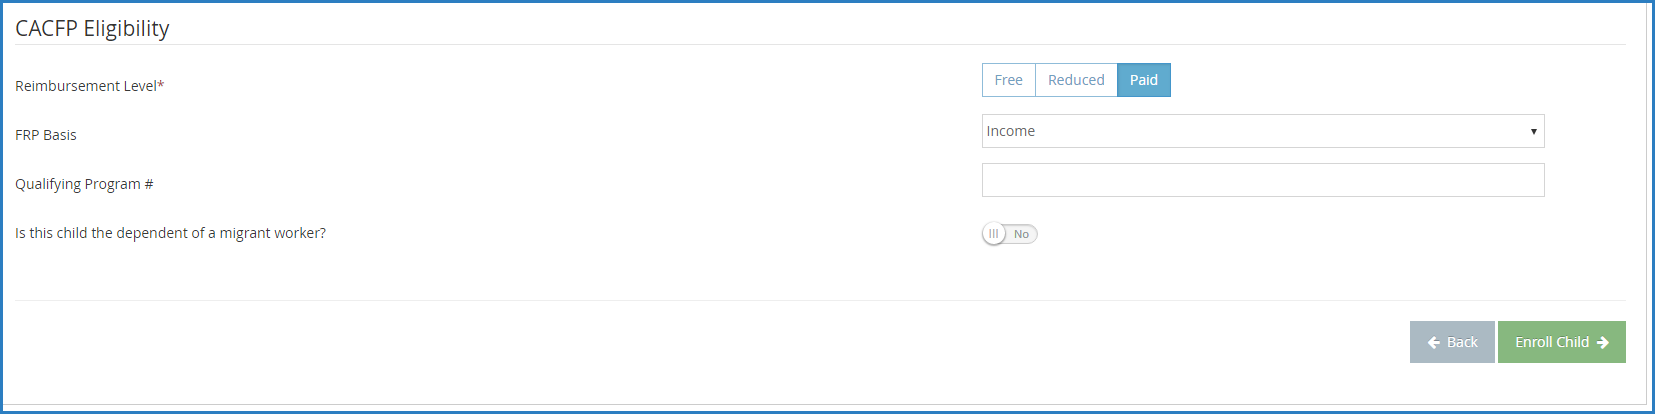
- If this participant qualifies as Free/Reduced under an federal assistance program (such as SNAP), click the Qualifying Program # box and enter the participant's program number.
- Click
 next to Is This Participant the Dependent of a Migrant Worker if this participant is a migrant worker's child.
- Click Enroll Participant. The View Participant page opens. You can now make changes to this participant's information.

 to select the date from a calendar.
 next to Will the Parent Provide Breastmilk.
 next to Will the Parent Provider Formula. If you set this to Yes, you do not have to enter anything in the Formula Offered box. Enter the formula name in the corresponding Name box.
 next to Will the Parent Provide Food.
 next to Infant Form on File to indicate that you have a form on file for this infant. This option may not display for all centers and is dependent on your policy settings.


 next to Is This Participant the Dependent of a Migrant Worker if this participant is a migrant worker's child.
Tip: You can use eForms to enter minimal child information into KidKare and send an electronic form to parents/guardians to complete and sign. For more information, see Adding Children Online.