
Enroll new centers in your program to provide them with access to the KidKare platform and allow them to begin submitting claims.
- From the menu to the left, click Center Management.
- Click Enroll Center. The Enroll Center page opens. This page is divided into three tabs:
- General
- License/Schedule
- Oversight
- In the General tab:
- In the Center Info section, click the Center Number box and enter an identifying number for this center. You can enter up to four (4) digits in this box. Then, click the Center Name box and enter the center's name. Lastly, click the Profit Status drop-down menu and select Non-Profit or For-Profit.
- In the Center Basics section, click the Original Start Date box and select the center's CACFP start date.
- In the Center Site Info section, click the State drop-down menu and select the state in which this center operates.
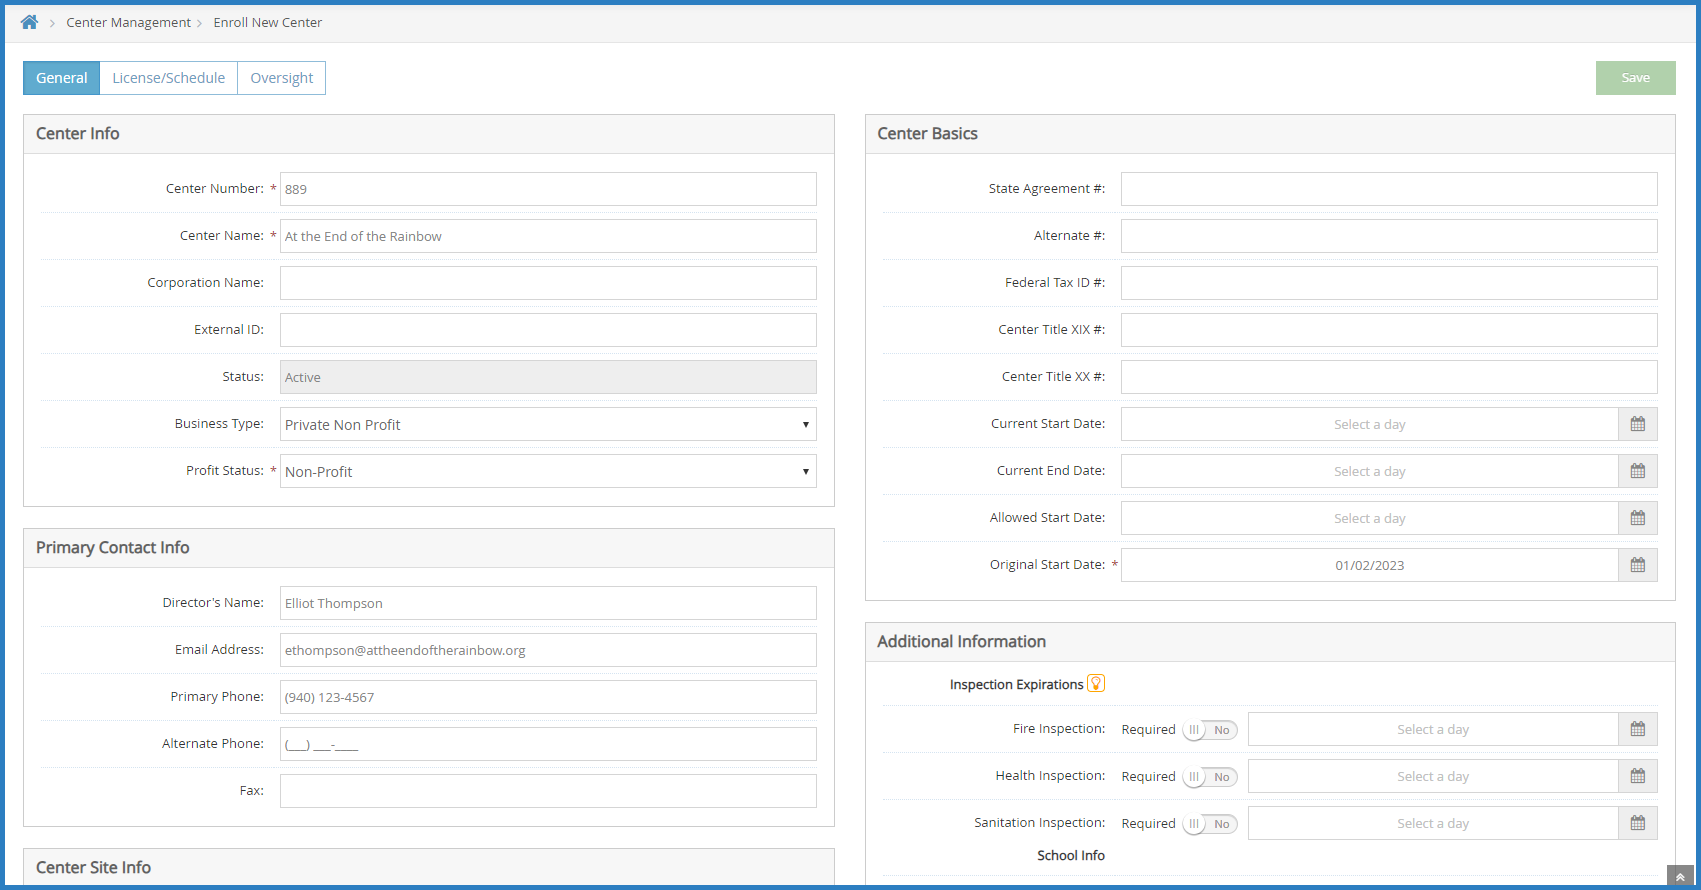
- Complete the remaining information in this tab, as needed. Note that while only the required fields are called out in this article, we strongly recommend you complete all other applicable fields, including the director's name and email address so you can send a welcome email through the program.
- Click the License/Schedule tab and complete the following:
- In the License Info section, Click the License Type drop-down menu and select the type of license under which the center operates.
- Click the Program Type drop-down menu and select a program type. You can choose from the following:
- Adult Day Care
- Child Care Center
- At Risk - ARAS
Note: Only select At Risk -ARAS if the center is At-Risk ONLY. If the center has both regular and At-Risk claims, select Child Care Center.
- OSCH - Outside School Hours Care
- Head Start
- Emergency/Homeless Shelter
- Summer Food Program (SFSP)
- Click the Total box in the Max Capacity section and enter the total number of children allowed at the center.
- Select the Approved Meals for this center.
- If this is an At-Risk/SFSP center:
- Click
 next to At-Risk/SFSP Participant.
 - Click the At-Risk/SFSP # box and enter the At-Risk or SFSP program number.
- Select each meal that is approved for At-Risk or SFSP.
Notes: If a site does both ARAS and SFSP, enroll them as two separate sites. For sites that do ARAS and have a regular claim, selecting meals here allows them to claim At-Risk meals.
- Click
- In the Meal Schedule section, enter a starting and ending time for each meal. You can type a single digit and press Tab. KidKare automatically formats the time for you.
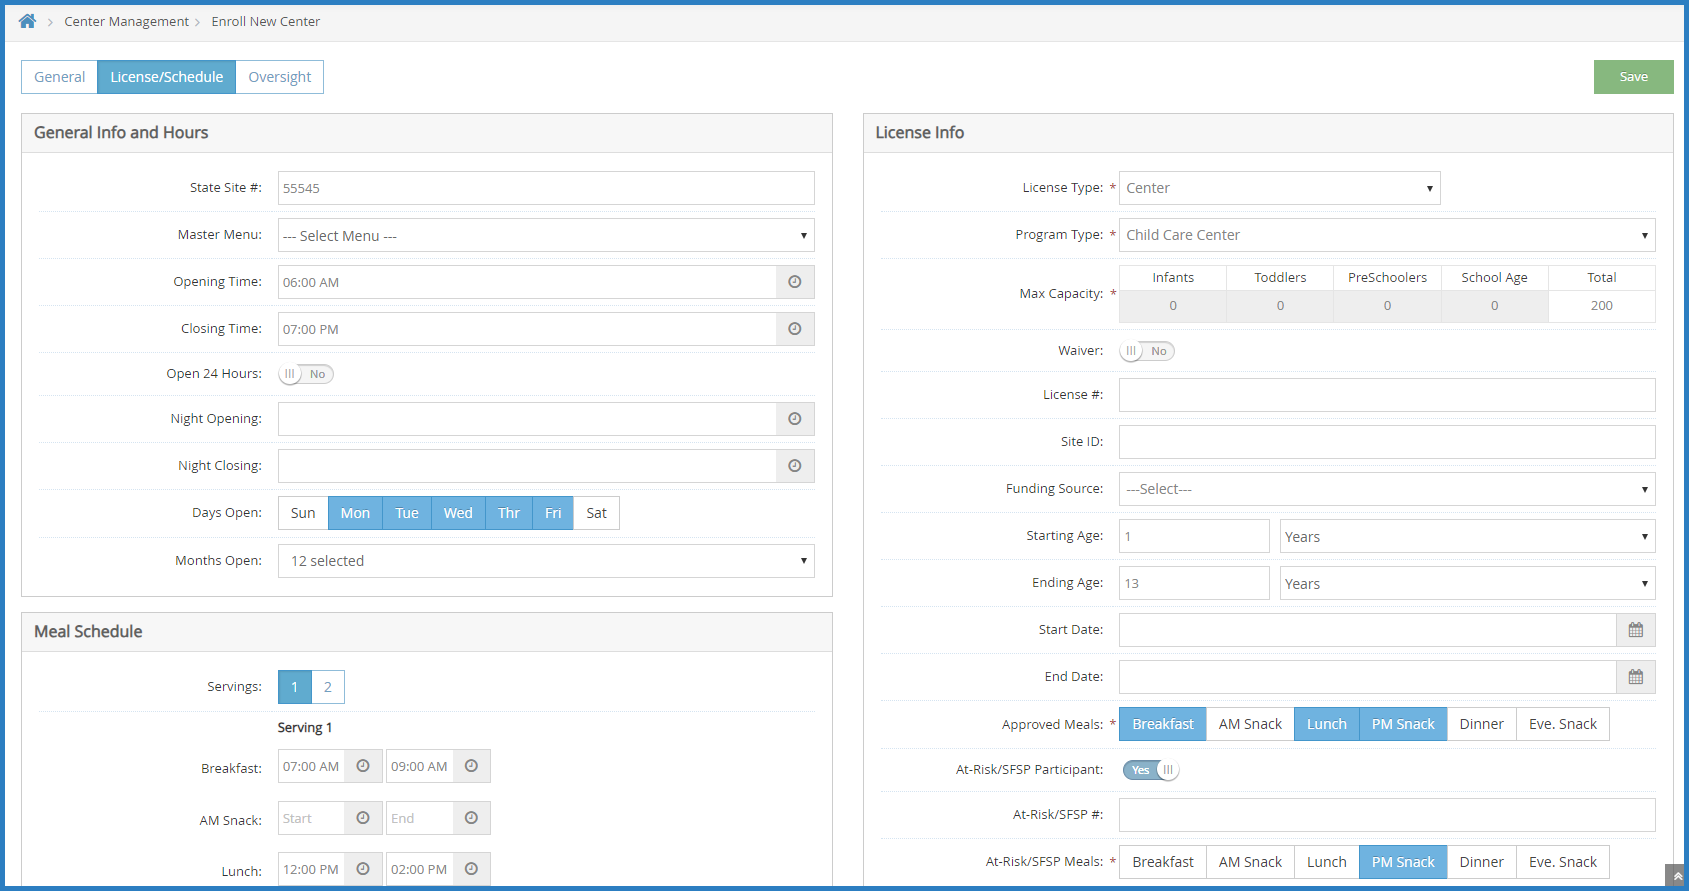
- Complete the remaining applicable information in this tab.
- Click the Oversight tab and complete the following:
- In the Center Info section, click the Driving Instructions box and enter any directions ad notes on getting to the center. These directions are available when leaving for site visits. You can also enter the mileage to the center and the map location.
- Click the Administration Type drop-down menu and choose from the following:
- Legally Separated from Sponsor: Select this option if you are a sponsoring organization.
- Legally Affiliated with Sponsor: Select this option if you are self-sponsored organization, such as a child care chain that does not disperse payment.
- In the Center Login Info section, you can update the center's log in ID and password to something easier, or you can accept the system-generated one. Click Send Welcome Letter to send a welcome email containing this login information to the center.
- In the Site Monitoring Info section, click the Monitor drop-down menu and assign a monitor to this system. If this menu is empty, create Monitor accounts.
- In the Center Payment Info section, click
 next to Pay via Direct Deposit to issue direct deposits to the center (KidKare creates the aCH file, which you then upload to your bank's website). If you select this option, you must select a bank account type, enter the bank account number, and the bank routing number.
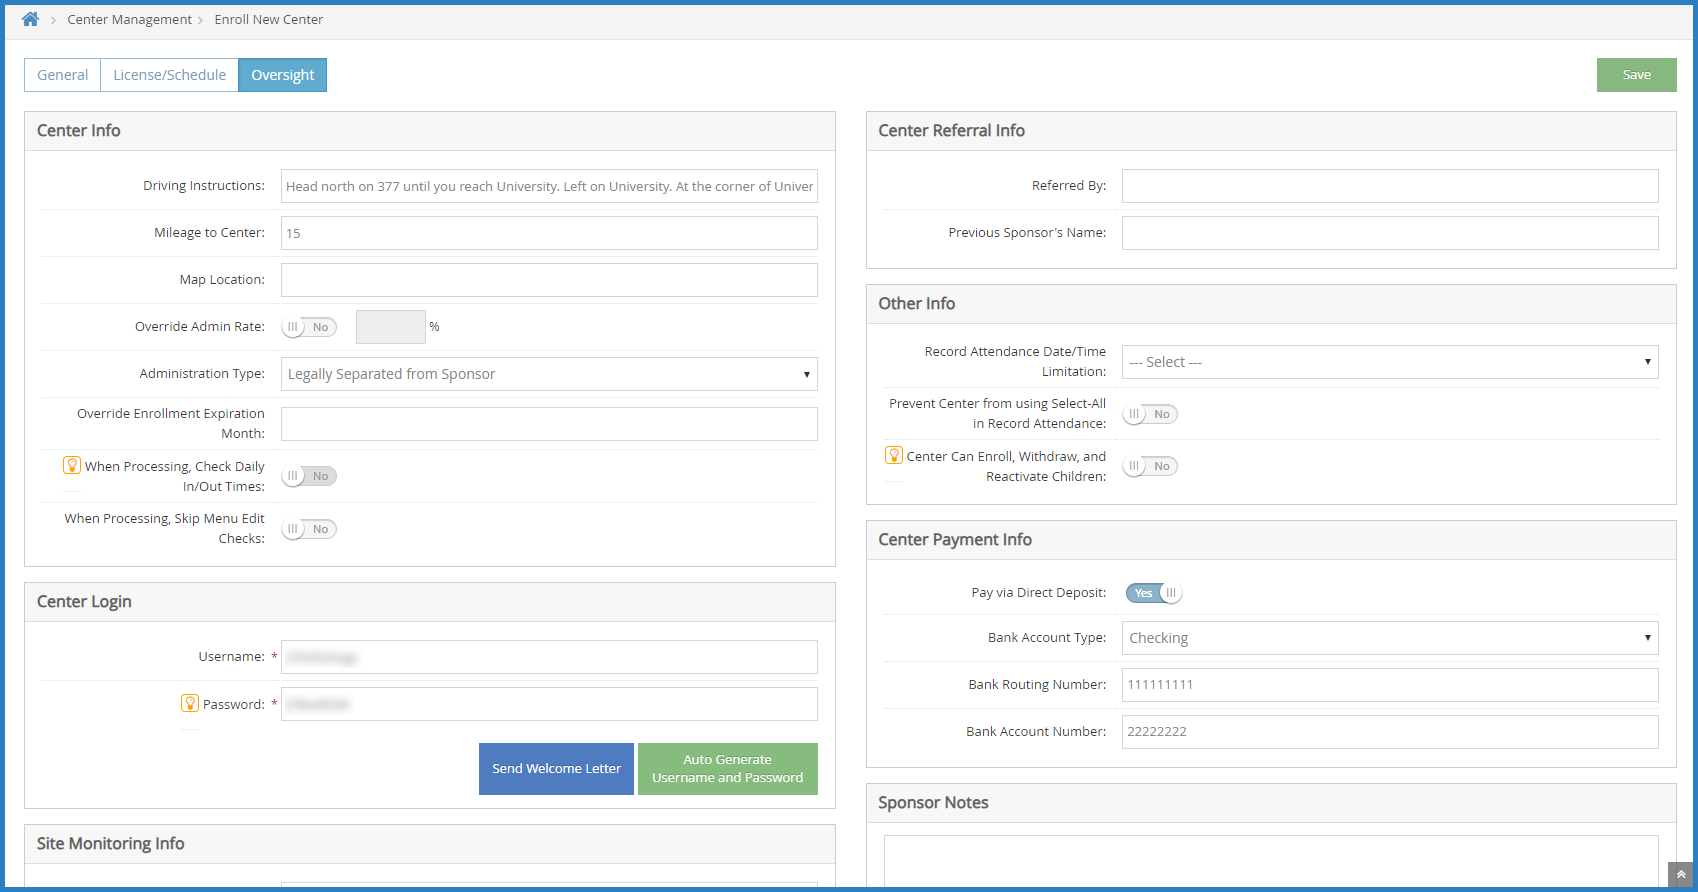
- Click Save.

 next to At-Risk/SFSP Participant.
 next to Pay via Direct Deposit to issue direct deposits to the center (KidKare creates the aCH file, which you then upload to your bank's website). If you select this option, you must select a bank account type, enter the bank account number, and the bank routing number.