
Once you have created claims in KidKare via the Process Claims function or by manually entering claims, they are added to the View Claims page. Access this page to review, manage, and update claims as needed.
View the Claims List
- From the menu to the left, click Claims.
- Select List Claims. The View Claims page opens.
- Set filters for the claims to view:
- Select the All Centers option or the Selected Center option. If you choose Selected Center, you must select a center at the top of the page.
- If you operate in multiple states, click the State drop-down menu and select the state(s) to view. You can also select All States.
- Click the Claim Month drop-down menu and select the claim month to view. You can also select All Months.
- Click Go. Claims matching the filters you set display.
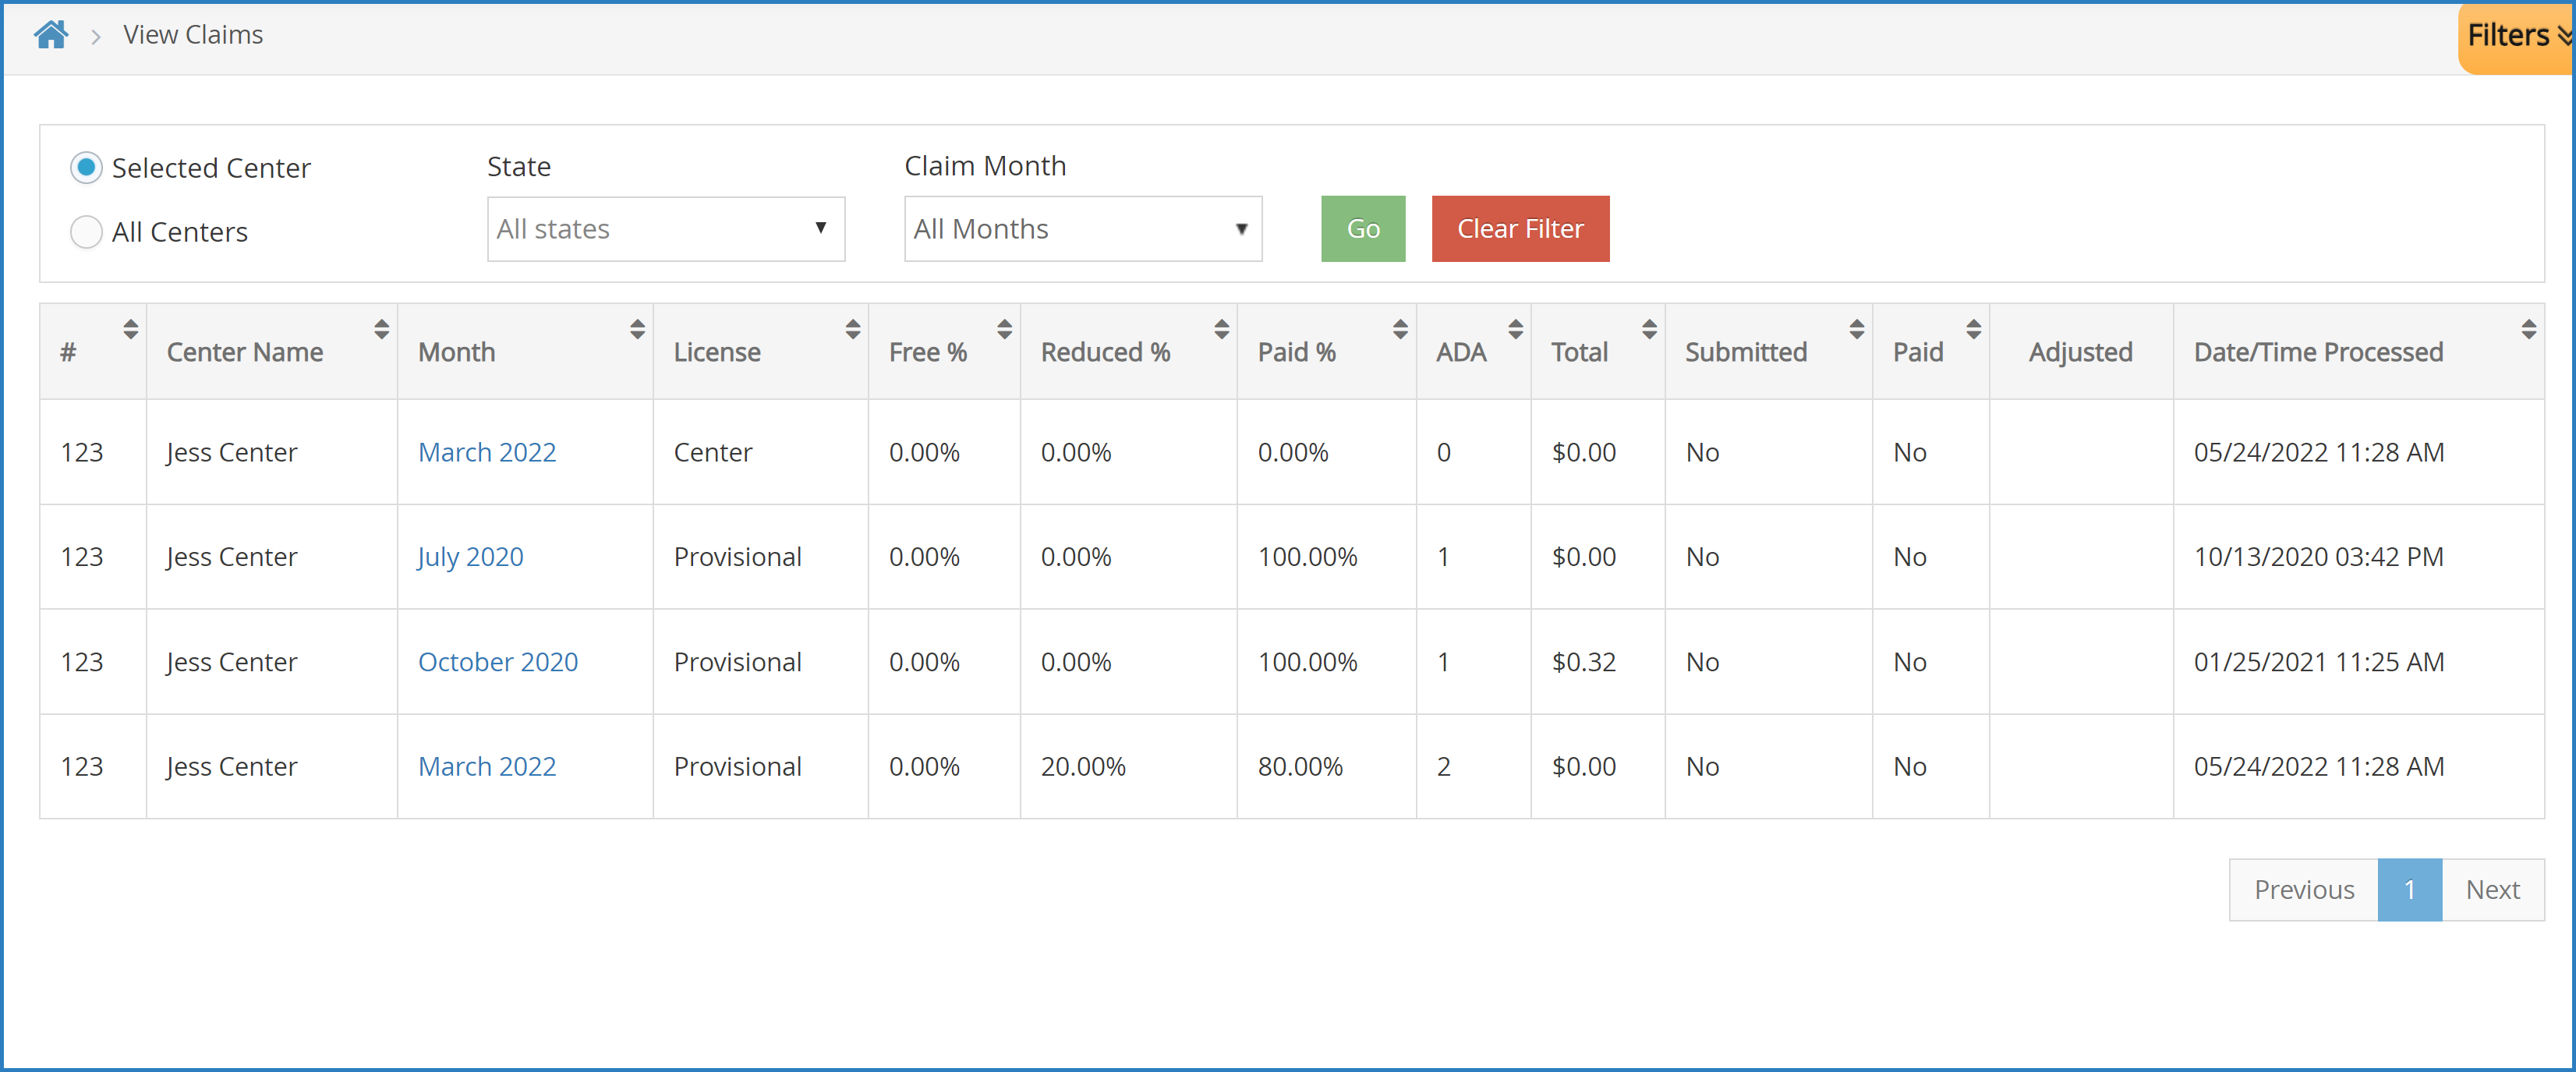
- You can do the following in this window:
- Click the link in the Month column to view claim details.
- Click each column header to sort information in ascending or descending order.
- Click Filters to customize the columns displayed on this page.

Understand Specific Columns in the List Claims Window
The following is a definition of specific columns found on the View Claims page:
- #: This column displays the number assigned to the center who submitted the claim.
- Center Name: This column displays the name of the center who submitted the claim.
- Month: This column displays the claim month for which the claim was submitted.
- License: This column displays the center's license for which the claim was submitted.
- Details: Click View in this column to view claim details.
- Free %/Reduced %/Paid %: These columns indicate the percentage of children on the claim who are reimbursed at Free, Reduced, or Paid rates.
- ADA: This column lists the average daily attendance reported on the claim.
- Total: This column lists the total dollar amount of the claim.
- Submitted: This column indicates whether or not you've marked this claim as submitted to the state.
- Paid: This column indicates whether the listed claim has been paid.
- Adjusted: This column indicates whether you've made any adjustments to this claim.
View Claim Details
The Claim Details window displays detailed information about claims you have processed. This includes the claim source, totals, and rates. You can also reprocess claims, print the Office Error Report, and adjust claim counts in this window.
- From the menu to the left, click Claims.
- Select List Claims. The View Claims page opens.
- Set filters for the claims to view:
- Select the All Centers option or the Selected Center option. If you choose Selected Center, you must select a center at the top of the page.
- If you operate in multiple states, click the State drop-down menu and select the state(s) to view. You can also select All States.
- Click the Claim Month drop-down menu and select the claim month to view. You can also select All Months.
- Click Go. Claims matching the filters you set display.
- Click the link in the Month column to open the Claim Details page for the claim to view.
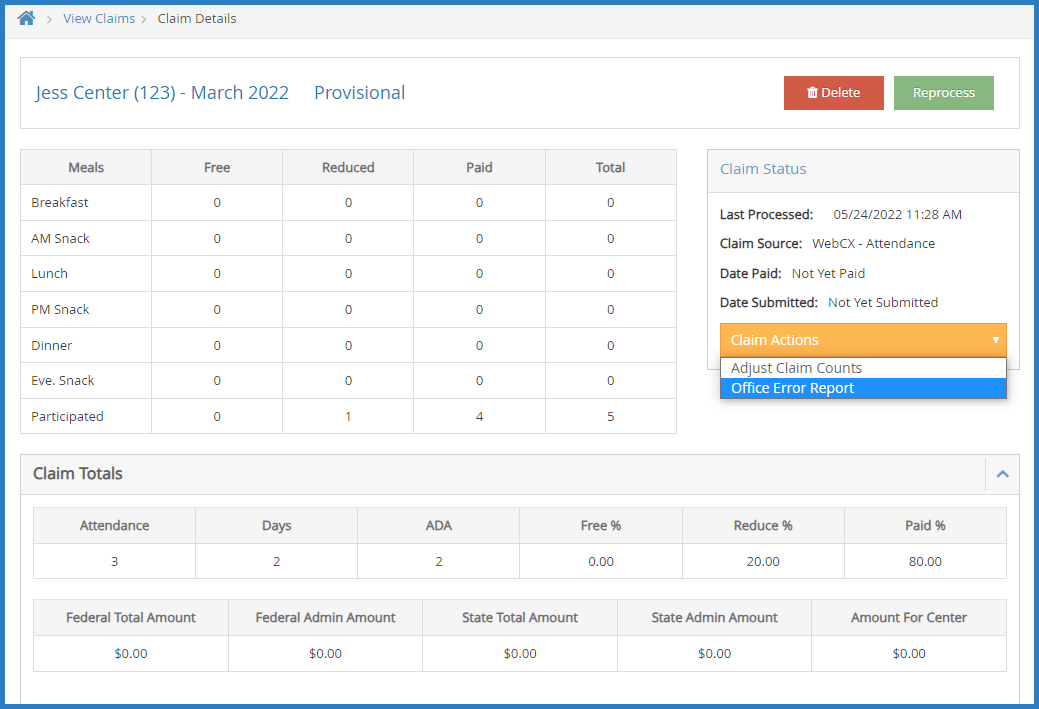
- You can do the following in this window:
- Reprocess the claim.
- Delete the claim.
- Adjust claim counts.
- Print the Office Error Report.
- View the Claim Summary, Claim Status, Claim Totals, the Claim Error List.
