
Indicate any known allergies or conditions in the Allergies/Conditions tab on the View Participant page. This is especially important if the participant requires any substitutions at meal time.
- From the menu to the left, click Children.
- Click Manage Child Information.
- In the top right, select the center of the child you are updating.
- Use the filters and choose the child name in the drop down. The Manage Child Information screen pops up.

- Click the Allergies/Conditions tab at the bottom of the window.
- Click Edit.
- Click
 next to Special Diet if the participant has a special diet. If you set this to Yes:
- The Milk Allergy option displays. Click
 to indicate that the participant has a milk allergy and does not drink Whole or 1%/Skim milk. You must have a doctor's statement on file. Two New fields will appear.
- Select who provides the alternative milk option for this participant.
- Select Substitute milk if this participant drinks substitute milk purchased and provided by the center.
- Select Parent Provided if the parent or guardian provides the milk substitute. This is the option you will select if participants are restricted to water as well.
- Select the Effective Date for this allergy. What day did you start serving substitute milk or parent provided milk to this participant instead of Whole or 1%/Skim?
- Select the Expiration Date for this allergy. If the participant grows out of their allergy or starts drinking regular milk again, enter the last day they were drinking substitute milk in this field in order to ensure milk audit accuracy.
- Select who provides the alternative milk option for this participant.
- The Diet Statement on File option displays. Click
 to indicate that you have a diet statement on file. Then, click the Expiration box and select the date the statement expires.
 - The Special Diet Notes box displays. Click this box and enter any notes about the participant's special diet.
- The Milk Allergy option displays. Click
- Click
 next to Special Needs if the participant has special needs. If you set this to yes, the Statement on File option displays. Click
  to indicate that you have a doctor's statement on file.
 - Click Add Condition to list allergies and/or medical conditions.
- Click the drop-down menu and select Allergy or Medical Condition.
- Click the corresponding text box and enter a description of the allergy/description.
- Click Add Condition to add another line. Click
 next to a line to remove it.
- Click Save.

 next to Special Diet if the participant has a special diet. If you set this to Yes:
 to indicate that the participant has a milk allergy and does not drink Whole or 1%/Skim milk. You must have a doctor's statement on file. Two New fields will appear.
 to indicate that you have a diet statement on file. Then, click the Expiration box and select the date the statement expires.
 next to Special Needs if the participant has special needs. If you set this to yes, the Statement on File option displays. Click
  to indicate that you have a doctor's statement on file.
 next to a line to remove it.
Pulling A Child Allergy Report
To pull a list of all participant allergies, follow the steps below.
- From the menu to the left, click on Reports.
- Select the category Children.
- Select the report Child List Export.
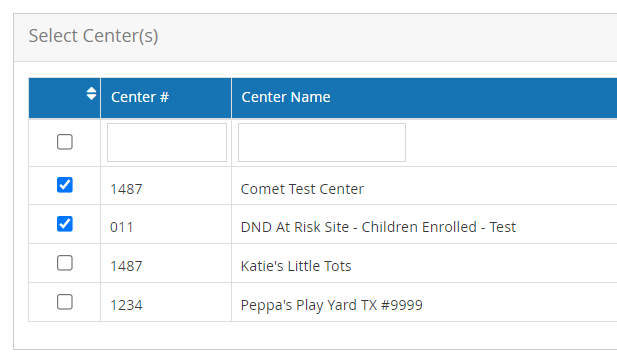
- The Filter for Center(s) box pops up. Click Search.
- A list of active centers generates. Select the centers you want included in the report.
- In the Child Export Filter, no changes need to be made in this section.
- Scroll down to the Select Fields(s) to Export and select the following boxes:
- Special Diet (Sp Diet, Statement, Statement of File)
- Special Needs (Sp Needs, Statement on File)
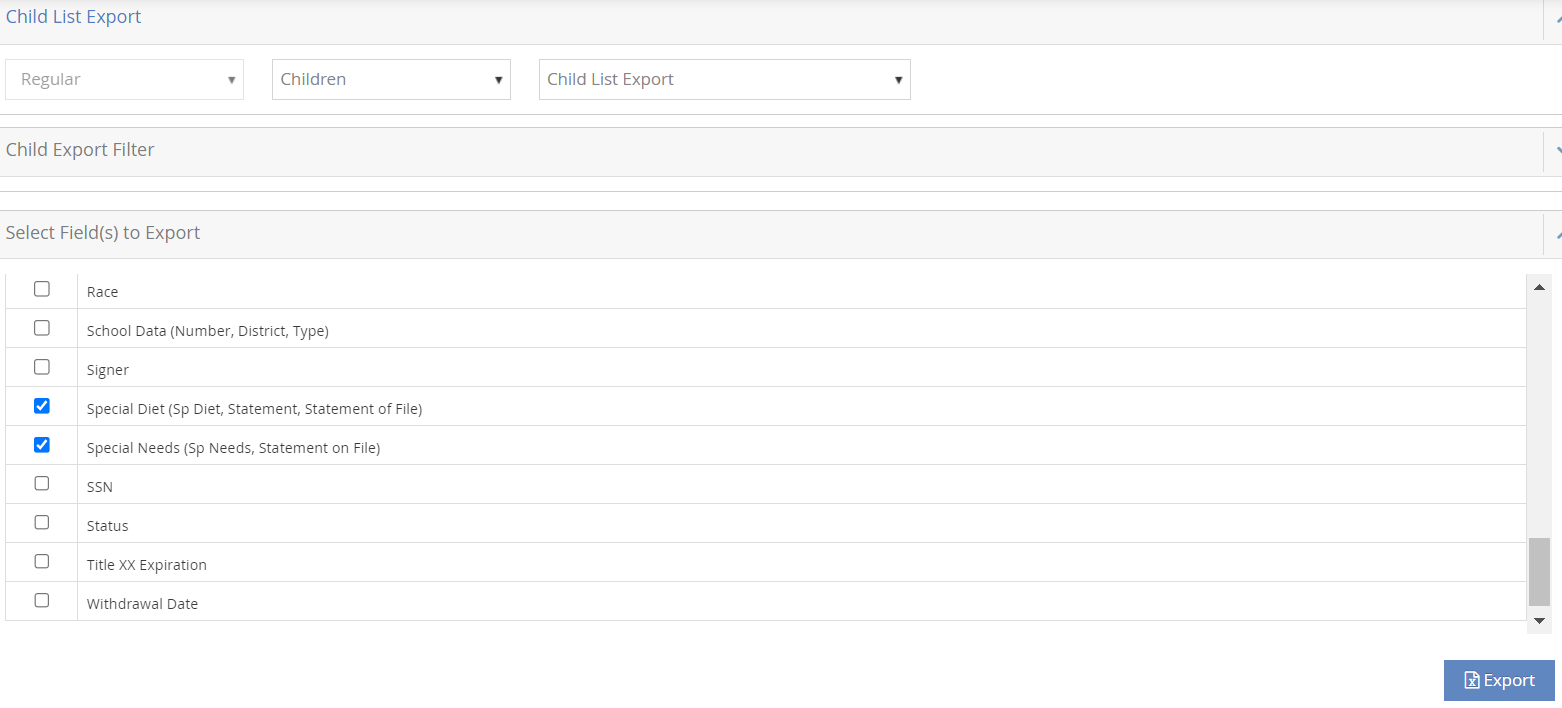
- Click Export.
- The report generates as an excel file with all of the data requested.

